Saturday, December 29, 2018

Final 2018 Projects?

Well, 2018 wasn't quite as productive a year as we might have hoped, but we had another good push on projects here in the 11th hour. Now that we have heat, December was actually a little project marathon.

First, we wanted to keep all that lovely heat inside. Most of the windows have storms, but a few didn't, so Chris built new storms for those. We also moved the storm door that was previously on the (modern) door between the kitchen and the lean-to out to be on the (original) door into the parlor; Chris also added plexiglass to the dining room screen door for some additional insulation.


Probably the biggest end-of-year project was painting the parlor. It was covered in wood paneling, which over the years had taken on a decidedly greenish tinge. Plus, we'd patched in a fairly large section where the front window no longer existed, and that paneling was darker and less green, so the whole thing was looking a bit shabby.

This took forever (ok, it took basically one full day) because of all the trim and because we had to brush every single groove in the paneling where the roller wouldn't reach. In the end, though, the room looks so much brighter and fresher!

Also, we put up some Christmas decor. Because Christmas.
The TV is sitting on an impromptu project -- it used to be on a rickety folding tray that was barely big enough to support it, and we'd picked up this old radio cabinet at an auction way back when we bought the farm. It's been sitting in the lean-to ever since, but Chris got a quick coat of polyurethane on it, and now it's all shiny and doing its job holding up the television (and providing a little much-needed storage). 

The next day, we had dueling dining room projects: I was patching the plaster, and Chris was turning the wood burner so it didn't stick out into the room so much. As you might expect, both of those seemed like they were going to be quicker projects than they really turned out to be. But we did get an unexpected bonus -- behind the wood burner, covered by the protective mat, we discovered another heat register!


As you'll see in the pictures, we did even a bit more -- on Boxing Day, my family came up to spend a day just hanging out at the farm, so Chris and I went up early and set up the dining room table. This had been the table and chairs from our house, which we replaced... a year or so ago?... and have had sitting around waiting for the dining room at the farm to be ready for them.

Wood stove in progress and completed...

Patching in progress and (mostly) completed...

We may still make it up there one more time before it's technically 2019. There's hope that the dining room might get primed yet this year. But basically, it's looking like the end of projects for 2018.

Here's hoping that 2019 brings
  • A completed chimney removal, roof repair, and wall (re-)instillation in the space between the dining room and kitchen
  • An end to the upstairs bedroom project that was literally one of the very first things we started
  • More project wrap ups
  • Less bats

Thursday, November 22, 2018

Thanksgiving 2018

We've owned the farm for (very slightly over) two years now, and while we still have a lot of projects to work on, we've continued to be pleasantly surprised by how smoothly most projects have gone. It has really been a fun project overall, and we have a lot to be thankful for. In no particular order, here's our farmhouse top 10 list for Thanksgiving.

1. Heat
Seriously, heat is great. We've been lucky to have the wood burner since the beginning that really kicks out a lot of heat, and how we're going to be extra toasty with central heat that we can schedule to turn on before we come up. 


2.  Good neighbors
We've been so lucky with our farmhouse neighbors. They're often stopping by in the summer with garden produce for us, and last winter, one of the neighbors plowed a path up our driveway all season so we could get in when we came up. They've shared what they know about the place, and the guy across the street even took us on a tour around the area. 

3. The front porch was saved
You may remember that I was prepared to cry if we had to lose that nice stone porch, so I'm definitely thankful that not only were we able to support and save it, but improve the steps so that the whole thing is a charming place for some quality front-porch-sitting... in those few moments we have for just sitting around.


4. Doors that open
It seems weird to be thankful for doors that basically just do their job, but in a house where we didn't get any keys at closing, everything's not-quite-straight, and most of the doors are at least a little sticky, we're definitely glad to be at a point where all available doors can be opened, closed, and (where applicable) locked. 

5. People pitching in
From the first moment that Tony Bucket hurried back from his dinner so we could write up an offer on the farmhouse before heading home, people have been lovely about helping to make this happen. My father, of course, has been basically a rock star. He's been ready to help with any project, and always does a careful and beautiful job. My mom has stripped wallpaper and painted. My sister has come from out of town to strip wallpaper and refinish windows. I think just about everyone in Chris's family has been part of the ongoing project to move the leftover rocks away from the front porch.


6. History lessons
One of the most fun parts of the farmhouse is that people seem to enjoy telling us about what the place was like before we owned it. We've had a former resident come for a tour and to share her stories. The neighbors are always a good source of information about what's been done and when. One of my coworkers is even the nephew of the man we bought it from. We have a lot of fun walking people through the place and listening to them share what they remember about how it used to be.

7. A roof over our head
The farmhouse roof is steep and can't be stepped on, making it one of the more terrifying parts of the house. Despite that, we've been able to get up to make the necessary repairs to keep the water (and sometimes the bats) out.


8. Hyacinth Bucket (van)
We would definitely not have made the progress we have without the bucket van. We've done roof repairs. We've scraped and painted. We've removed and replaced storm windows. We've moved in a boxspring. We've picked apples. We've repaired a chimney. And through all of that, we haven't had to worry about falling off ladders. Seriously, that van is great. 10/10, would buy again.

9. We can actually vacation at the farm
We have a functional kitchen, a television, and two complete bedrooms. We have a working bathroom and a window a/c unit. We're finally at the point where we don't have to necessarily hustle every single second of every single visit to the farmhouse, and that's a very good feeling, indeed.


10. The water's still flowing
Even when we winterize, we have a steady outflow of water. We've cleared the ditch a bit, and we may have successfully found the outflow for the basement floor drain (which may mean less basement flooding in the future?). In a world where even pretty nearby, access to clean water isn't a guarantee, the fact that we have water that literally is constantly flowing through our house at all times is pretty great.

Happy Thanksgiving, all.

All Mod Cons pt. 2

So, this is finally an update to a project that has been (sort of) underway since Labor Day weekend. That weekend, we had planned to remove the excess chimney, but it turned out we didn't have quite the tools we needed and weren't quite sure the weather was going to be good enough to warrant putting a hole in the roof. So instead, we tackled the furnace.

First, there was the matter of unhooking and removing the old furnace. We were anticipating that this might be a huge, heavy job... but surprisingly, it mostly wasn't. It came out easily, and while taking it out the back stairs was awkward, it was significantly easier than when we attempted to do the same thing with the old water heater.

Out with the old!
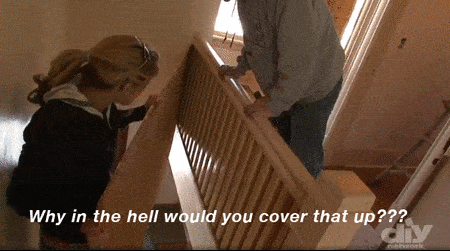
Then we were faced with the somewhat more daunting task of getting the new furnace installed. This furnace had come out of our primary house when we had that furnace replaced over a year ago, so it had been sitting in the farmhouse basement for awhile surrounded by random pieces of ducting that we hoped would be useful. The initial work took most of an afternoon with my dad getting the gas lines run around to where the new hookups were, and Chris and I trying to figure out how to put a square peg in a round hole -- a.k.a., getting the old duct work to align with the new furnace.

In with the new(er)
By the end of the day, we had everything pretty roughed in, but it took Chris and I a few more weekends to get everything really set to go. Then there were some other matters to attend to. For one, the house wasn't that clean when we moved in, and the furnace hadn't been run in something like 2 - 15 years, so we were confident that if the ducts were just full of dust, we could count ourselves lucky.

We initially thought that we might be able to tape some rags onto the end of chimney sweeping poles and run those through the ducts, but we quickly discovered that even a much more flexible piece of PVC just wasn't flexible enough to make the nearly 90 degree angle through the vents. Fortunately, then Chris realized that we had a very long hose that was exactly the same size as the hose on the shopvac (the hose had previously been employed draining the flooded basement). So we attached that to the vacuum, and down the holes it went.
This job sucks.
Then there was the matter of the chimney itself, which we weren't positive was actually open, which is an important part of the function of a chimney. We kept hoping to get a friend with a drone to come up and look at it for us, but then Chris answered the question in the way that people presumably answered this question for centuries before drones came along... we stuck a mirror into the chimney and looked up.
Then it comes to be that the soothing light at the end of your tunnel is daylight coming through the chimney opening.
The chimney was open. The ducts were clean-ish. Everything was installed. Chris and one of his buddies even stopped up one day and brought the stove in from the lean-to where it had been languishing for the past year and a half.
Just like a real kitchen!
So, yesterday was the moment of truth... we scheduled DTE to come out and turn on the gas. In an unexpected turn of events, they said a technician would arrive between 12 and 4 p.m., and he actually arrived by 12:30, making this possibly the most timely service call ever.
DTE said "let there be heat!" And there was heat. And it was good.
The furnace was the easy part. Despite having sat for quite awhile, it fired right up and immediately started pumping lovely heat throughout the house. The initial whoomph did also blow a bunch of nastiness out of the ducts, but... I guess they're cleaner now?

The stove was actually the hard part because when we turned on the gas at the appliance... nothing happened. There wasn't even gas coming through the lines. This was odd, especially since the furnace was already blowing steadily -- a clear indicator that the gas was coming into the house just fine. Chris and the gas technician looked around the basement a few times trying to see if there was another shutoff somewhere, but couldn't find anything. We all stared deeply into the creepy crawlspace that runs under the kitchen, hoping the flashlight would not hit a shutoff valve that would require someone to actually slither under there. We discussed breaking a pipe open to see if a blockage could be discovered by snaking wire through the pipes. Then we all looked one more time, and I found the shutoff, and then everything worked out just fine.
Cooking celebration ramen. As one does.
It should be noted that about 30 seconds after taking the picture above, I had both the coat and hat off because it was warming up significantly in the house.

So that's how it came to be that two years and three days after initially purchasing the farmhouse, we now have central heat and a working range.


Monday, September 24, 2018

Opening Doors

When we first looked at the farmhouse, one of the things we really liked is that it still had a lot of the old fixtures and detailing, including the door hardware. The downside to this was that this door, going from the front porch into the parlor, was unopenable. We weren't sure if the door was just totally jammed shut, or if it was locked using the skeleton key (which we didn't have anyway).

Antique security system: the doors just don't open.
Then, this summer, we discovered that Chris's father had a whole bunch of skeleton keys that he'd picked up over the years. This made the strategy of randomly trying keys to see if they'd fit the lock seem a bit more reasonable -- or at least less like we'd have to start by purchasing a whole bunch of keys that probably wouldn't work. So, off I went, keys in hand.

I started out trying all the keys, but it seemed like there was potentially some issue with the lock mechanism itself -- a few keys felt like they were trying to push against something, but the lock wouldn't budge. So, I decided to go back to the option of brute force, just in case that worked. It wasn't an especially humid day, which was good, because it turned out that the answer to "why doesn't the door open?" was just that it was swollen (and a little bit painted) shut. A little finessing and scraping, and then some mighty shoving, got the door open.

Probably the first time in at least 15 years this door has been open.
Now the door was open... which put the pressure on to find a way to be able to lock it again before I went home. Fortunately, with the door open, I was able to take out the lock and discover why it wouldn't work: it was full of dirt and rust.

Ewww.
This was a problem for WD-40. I had that. In the end, the entire lock had to be taken apart, cleaned, lubed up, and put back together... at which point, it turned out that one of the keys in the Random Bag O' Keys actually did fit our lock!


With this success under my belt, I took apart and cleaned the lock on the door from the porch into the kitchen -- it was also disgusting inside, and the same skeleton key fitted that lock. In fact, the same key also opened our interior doors, like the door to the upstairs. There's still a bit of work to do on these -- the striker plates don't line up well with the door mechanisms (not sure why... are these door handles actually replacements?) and the doors still need some planing before they'll open well during the worst of summer heat and humidity, but we now officially have keys to the house!

Friday, September 21, 2018

In Which We Very Nearly Finish Something

Good news for anyone who wants to come help work on the farm: we now have a guest room, so we can hold you hostage and ensure you don't leave until the work is complete. You won't have a door on the bedroom, but you won't care because you'll have the whole upstairs to yourself. And you'll have to walk through the construction staging area that's the upstairs hallway in order to get to the bathroom at night, but that's just part of the experience.

Or you could just look at these pictures.

So, a long time ago, we had done the baseline work for the back bedroom: painting the walls and the floor.

Not featured: the floor paint
Well, now we've finally made real progress in this space. For one, you can see in the picture above that the baseboards in this room were incomplete. They were also unpainted 2x4s. All the rest of the upstairs has the wide baseboards you can just barely see behind the paint cans in the hallway. So during our Fourth of July week at the farm, we broke out some wide boards and finished the baseboards for that room.

Cutting mitered angles is the worst.
 We went with the process of "measure twice, overthink about whether or not you're cutting the right end of the board, measure a few more times, cut once, dry fit, measure again, trim down."
Oooh! Wide!
That little bumped out bit was a little tricky because (of course) it isn't smooth, which is probably why the previous folks never bothered finish the baseboards. Once we got the boards in place, it was time to paint and caulk the trim. I have to say that one thing I've definitely learned from our farm projects is that nothing makes a job look quite as complete as some well-placed caulk.

Houston, we have baseboards.
At this stage, we had a complication. The goal was to put a queen-sized bed in this room. We did the measuring, and it would be a bit tight, but doable. So we got a bed... and then realized that taking a queen-sized boxsprings up the steep staircase with a low header was so tight as to not be doable at all. My dad suggested taking first few stair treads off, but when we tried that, it quickly became apparent that we'd actually have to take off about half the staircase worth of treads.

Seriously, this van is the best.
So, we took out the window, put rope around the boxspring, and used the bucket van to take it in through the window. Ridiculous? Maybe. Effective? Absolutely. Since we had the window out, we went ahead and repaired the sashes, reglazed the glass, etc. Now we have something that's looking like an actual bedroom for actual people to stay in!

Never fear -- we have since added pillows.
You can't quite see it in this photo, but we still need to get the light fixture in place (but we have one) and then the aforementioned door needs to be painted and hung, but this room is awfully close to finished! It's actually more finished than the master in some ways... maybe we need to start sleeping up here while we paint downstairs.

Wednesday, September 19, 2018

In Which Life Happens

So, the chimney topple featured in the last post happened in September of 2017. After that, a whole lot of things happened. At the farm, we continued painting on the exterior work already featured in the Curb Appeal post. But a lot of what happened wasn't at the farm at all.

In November, we went to Arizona to visit Chris's dad for Thanksgiving.

This house is in much worse shape than the farm. Nice view, though.
In December, we went to Maryland for Christmas with my sister, where I repaid her for her work on the farm by helping to re-tile the backsplash in her kitchen.

This is the nicest kitchen you'll ever see on this blog.
In February and March, I built my sister a Cyberman head for a cosplay she was working on.

Inspiration.
What happens when you give me bad weather, Styrofoam, and craft paint.

Also in March, I got diagnosed with breast cancer. In April, I had a bilateral mastectomy. The good news is that they believe they got all the cancer. The bad news, at least for the farm, was that I spent a lot of the spring recovering strength and stamina.

In May, the whole family got together in Shenandoah National Park to celebrate my parents' anniversary. I hiked to this waterfall and immediately regretted it, realizing that "recovering strength and stamina" thing was still very much in progress.

Lovely. But not worth it.
And by then, it was basically this summer, which was largely spent patching plaster in the upstairs bedroom (which you already saw). Oh, and then I had sinus surgery, because you can never have too much surgery. So then I was on lifting restrictions again for a few more weeks.

One nice farm-related thing out of all of this was that we also spent some time actually just up there enjoying the farm. We took the cat with us and spent the week of July 4th at the farm, working on some projects, but also getting out into town and just relaxing.

Remnar at the farm.
There are a few more projects from this summer that I'll still update you on, but sadly, a lot of the past nine months or so were spent mostly focused on non-farm issues. Now that we're finally picking up the pace again, the nice weather is fading fast, so we'll see what else we're able to get done before winter.

Tuesday, September 18, 2018

Then The Chimney Fell Over

Just to stay honest about the timeline here, the following incident occurred almost exactly a year ago, in September of 2017. We had gone up to the farm, but didn't have much time to work on things... and we discovered this:

Santa's not getting down THAT chimney...
This was especially not good because of all the chimneys you see here, the one that fell over is the only one that actually gets USED. The one to its right isn't even attached to anything; the one to its left is still kind of an unknown quantity. But this chimney belongs to the wood stove that keeps us from fully turning into icicles when we're working at the farm during the winter.

Unfortunately, we really didn't have time to deal with the chimney, so we stuffed rags down the hole to keep out critters and went home to make a plan and gather supplies.

The good news with this project was that nothing substantial was actually broken. The chimney had a number of guy-wires stabilizing it, and those wires were not even remotely an appropriate strength. After many years of service, they'd just given out, and without the extra stability, the chimney blew over. While a few tiles got a bit cracked, there wasn't even much damage to the roof.

The bad news with this project is that chimneys are heavy and tall, and there was absolutely no way that puny humans standing on the lean-to roof were going to have the strength or leverage to lift the chimney back into position. Fortunately, these puny humans have a bucket van, and we were able to get a strap around the upper part of the chimney, attach the strap to the bucket, and then maneuver the bucket to lift and position the chimney. A bit hair raising? Yes. Ultimately successful? Also yes.

Standing tall
With the help of some new -- much more substantial -- guy-wires, the chimney got secured back in its place, where it will hopefully stay for years to come.

Monday, September 17, 2018

Curb Appeal: We Have It (Now)

So, when last I was posting, I believe the exterior of the farmhouse looked about like this:

Already better than when we bought it.
Since then, a LOT of things have been done to the outside of the house, and I have to say, it's looking pretty darn spiffy. For one, my dad painted us a faux-window to even out the visual balance of the big window into the parlor.

Symmetry. It's a good thing.
We also got the weird bit of siding over the front porch primed and painted so it would match better with the actual siding.


We also got the lean-to painted to match, and repainted the trim. But the biggest improvement is that my dad rebuilt the porch steps, using the old stones to create new pillars. It was a huge job -- the old steps had to be broken up with a jackhammer, and there was a LOT of debris to clear away -- but the result makes an amazing difference.

So nice!
That sidewalk was an unexpected bonus -- while he was clearing out the porch debris, my dad uncovered the pad at the bottom of the steps. It looked like it kind of disappeared into the grass, and after a lot of digging, Chris discovered a sidewalk that goes all the way around to the lean-to!

Just recently, we were at work on the porch again, but this time, we were just cleaning. Cleaning the cedar siding along the back wall of the porch had probably last been done... never. So just a little elbow grease made a visible difference.

Unwashed on top. Washed on bottom. Yes, that's a backward way to clean.
This past weekend was sunny and warm, with no rain in the immediate forecast (it's been a surprisingly rainy summer this year), so we were able to get out and seal the wood -- the walls and the new steps and the porch swing -- and the masonry, which will hopefully help protect the mortar against future weathering.

It's like a real house!
We're pretty pleased with how things are looking -- and so are the neighbors. We've had a lot of comments about the snazzy new porch steps, and everyone agrees it looks a lot less like an abandoned, haunted house than when we first bought it.

Sunday, September 16, 2018

Freshening Up the Kitchen

In other projects, we got the kitchen cabinets painted. As you may recall, previously, the uppers and lowers weren't the same color (of course) and the hardware was on the ugly side. Around the end of last July, we started painting the cabinets a clean, slightly-creamy white.

Looks cleaner already.
The doors and drawers got a similar treatment, plus new handles. Much like the window in the last post, this is a project that started last summer, and finally got wrapped up this summer, when I finally put the lower cabinet doors back on. Oops.

Things are getting surprisingly matchy.
Still needed: doors or curtains for the cabinets right under the kitchen sink. And, you know, literally everything else in the kitchen.

Then I Remembered There Was a Blog

Well. It's been... roughly 14 months since I updated this blog. So that happened.

A lot has happened since last summer, and some of it was even at the farmhouse. I'm not even sure where we left off with this thing...

{Reviews the footage}

Ok. The automatic backing up of my phone to Google photos tells me that about the time of my last post, my lovely sister came out to visit for a week to help with some farm projects. That's actually kind of a perfect starting point, because one of the main projects we worked on was removing, repairing, reglazing, and reinstalling the window in the upstairs bedroom.

Sister. Destruction. Nothing to see here.
Why is this a perfect starting point? Because what we actually achieved on the window project was just the removing, repairing, and reglazing. And just this past weekend, Chris and I fully reinstalled the window. Yes, over a year later. Don't judge.

In between, we did a lot of other things to this room. Not things that make it actually finished, but things that make it look less like it did in the picture above and more like this.

All the walls are the same color. Progress.

This actually isn't even a totally updated photo, but it gets the point across. It definitely looked even worse before it got better, though. When you put paneling up over plaster, and you drive a bunch of nails into said plaster, those nails don't leave dainty little holes like they might in drywall. Combine that with 100+ years of existence, and you get plaster that was a bit on the sad side. Not as sad as we initially feared, but definitely in need of some love... and a LOT of patching.

So much patching.
This was followed by a lot of priming. The ceiling took two coats of paint to go from mustard yellow to normal ceiling white. Fortunately, my mom volunteered a day to come help us out, and she took care of the first coat of paint. The walls and ceiling were so dry that they just sucked up paint, so even just priming the room felt like it took forever.

Chris takes a turn priming.
For now, the room is still sitting in primer. The ceiling is finished, and the window is back in its casing -- now with all the trim pieces reinstalled! Wallpaper has been purchased, and the guide-lines are set on the walls for easy (knock on wood) wallpaper installation. Right now, that project is just awaiting slightly cooler weather (or a rainy day when we can't be working outside). So, hang some wallpaper on the top halves of the walls, install some wainscotting on the lower parts of the walls, paint the trim, install the light fixture, paint and install the door... we're (not even a little bit) practically finished!

More posts to come. I promise.