Showing posts with label exterior. Show all posts

Tuesday, September 17, 2019

Gutteral

Another big-ish project for this summer was that we installed gutters. Well, gutter. I don't have a lot of pictures of this one because it was the kind of project where you're busy getting everything laid out and measured and dry fit and then actually fit, and then you have to try to figure out how to hold the stupid gutter with one person on a ladder and one person in the bucket van, and then you finally get it attached and then it leaks anyhow and you have to take it apart and reseal things.

You can barely see the gutter, but the downspout is kind of visible?
But eventually, we think we got the gutter sorted out... just in time for the bucket van to start making a kind of terrible noise that eventually required me to scramble out of the bucket onto the porch and the rest of the day's projects to revolve around Chris trying to fix the van so that we could retract the bucket and get the van out of the lawn. If he wants to eventually add in what was actually wrong and how he fixed it, I'm going to let him do that because honestly, I don't really remember what all was involved. It was broken, but he fixed it. Then he was able to figure out what parts it needed and fix it more permanently the next weekend.

We're still hoping to run a gutter along the north side of the house (in the picture above, you're seeing the corner where the south and east sides meet). The hope is that this will help get water away from the foundation and a) keep the foundation sturdy and b) maybe help keep water out of the basement.

Friday, September 13, 2019

Bonus Roofing Project

Once we were in the groove and had figured out the slate ripper, Chris and I got up on the roof one more time after the Huge Chimney Deconstruction to replace some other tiles that had long been cracked.

Out with the old
One of the things I've enjoyed about this farm project is that we're having to figure out and learn skills -- like repairing your own tile roof -- that most people, even sometimes the people in the modern version of that trade, no longer have. And as a bonus, we're on our way to a pretty sweet looking roof!

Look how nice it can be!

Tuesday, September 10, 2019

Chim-Chiminey, Chim-Chiminey, Chim-Chim-Cheree

One of the very first projects we anticipated when we bought the farmhouse was taking down the extra chimney. From what we could tell, it maybe wasn't in great shape, and more importantly, it served absolutely no purpose.

The chimney on the left is purely decorative
At one point, the chimney may have served a cookstove in the kitchen, and we know that it once served the wood burner that's still in the house. But prior to our ownership, the wood burner got moved to the dining room and got a new chimney (which featured in its own blog post last fall). To keep the chimney from collapsing into the house, the previous owner decided to just put in a small closet, which is clearly to code.

We almost did this project last summer, but the threat of rain coupled with some indecision about exactly HOW we were going to get up there and remove the chimney when the roof is fairly steep and also you can't step on it because you'll crack the tiles. That meant that by THIS summer, we'd had a full year to prepare our game plan and gather supplies.

And it turns out... that actually paid off.

First, we got ladder hooks, which are pretty much what they sound like -- they attach to the ladder and allow it to slide up the roof and hook over the ridge, distributing the weight of the ladder. Like so.

Testing the ladder hooks
Then my father brought up ladder jacks, which look like they should be used as bear traps or something, but actually attach to the ladder and allow you to set boards across the two ladders to make a flat, stable platform. For added safety, we had harnesses tied off to the bucket van. So from there, dad and I were able to spend a morning up on the roof, trying to gently take out the chimney without dropping bricks or loose mortar onto the roof tiles. Chris took the hard job of trudging up and down ladders all day to haul down the bricks and mortar we removed.

The actual taking down of the chimney was not significantly harder than playing Jenga. A fairly light tap with a hammer was enough to loosen up most of the chimney, and bricks came out with basically no effort.

By the time we were reaching through the roof into the attic, however, the whole chimney was swaying significantly every time you touched it. That didn't seem great, since we didn't really want to knock down ten feet of chimney into the attic. When we regrouped inside for further demo, Chris and Dad rigged up a couple boards to brace the chimney a bit... and then the rest of the chimney was also super loose and in about the same amount of time it took to measure, find boards, and screw in the braces, they'd taken down the chimney past the point where the braces were helpful.

Good-bye, chimney.
Soon enough, we were finding the tools that had been dropped down the chimney earlier, shockingly well-preserved bird skeletons, and a lot of years of soot and dust and dirt and general nastiness that had to get scooped out. But eventually, we reached the kitchen!


Yes, this is the "closet" that was supporting the chimney.

I'm standing in the kitchen, looking up to the hole in my roof.
So then the chimney was gone, and we were left with a hole in the roof, which is the downside to removing a chimney. Fortunately, this was easily remedied.

No more skylight!
This was the point where we decided to be smart and let this be a two-day project. The next day, we were sore, but back at it. After a little aerial YouTubing, we figured out how to use a slate ripper, which is a tool that looks like it's not going to do anything, but somehow manages to slip up between roof tiles and rip out the nails so you can remove a tile without having to remove every single tile that overlaps it. Then we set about taking out the partial tiles, installing new tiles... and fixing the tiles we accidentally broke with the ladder. Oops.

New tiles!
Finally, it was time to splice in some new metal over the ridge, re-attach the lightening rod assembly, and ta-da! -- a totally fixed up roof!

Roof, now with less chimney!
From up close, it's pretty obvious which tiles are the new ones, but from the ground, it's like the whole chimney never even happened.

No chimney!
All in all, this was one of the more rewarding projects. Once we took the chimney down in the attic, for instance, we were able to get in and finish up the insulation project from the last post. Having the chimney out is also going to let us (hopefully yet this fall/winter??) move ahead with putting a wall back in between the kitchen and dining room. So I guess the "reward" here is more projects, but it still felt really good to get this big one done.

Saturday, December 29, 2018

Final 2018 Projects?

Well, 2018 wasn't quite as productive a year as we might have hoped, but we had another good push on projects here in the 11th hour. Now that we have heat, December was actually a little project marathon.

First, we wanted to keep all that lovely heat inside. Most of the windows have storms, but a few didn't, so Chris built new storms for those. We also moved the storm door that was previously on the (modern) door between the kitchen and the lean-to out to be on the (original) door into the parlor; Chris also added plexiglass to the dining room screen door for some additional insulation.


Probably the biggest end-of-year project was painting the parlor. It was covered in wood paneling, which over the years had taken on a decidedly greenish tinge. Plus, we'd patched in a fairly large section where the front window no longer existed, and that paneling was darker and less green, so the whole thing was looking a bit shabby.

This took forever (ok, it took basically one full day) because of all the trim and because we had to brush every single groove in the paneling where the roller wouldn't reach. In the end, though, the room looks so much brighter and fresher!

Also, we put up some Christmas decor. Because Christmas.
The TV is sitting on an impromptu project -- it used to be on a rickety folding tray that was barely big enough to support it, and we'd picked up this old radio cabinet at an auction way back when we bought the farm. It's been sitting in the lean-to ever since, but Chris got a quick coat of polyurethane on it, and now it's all shiny and doing its job holding up the television (and providing a little much-needed storage). 

The next day, we had dueling dining room projects: I was patching the plaster, and Chris was turning the wood burner so it didn't stick out into the room so much. As you might expect, both of those seemed like they were going to be quicker projects than they really turned out to be. But we did get an unexpected bonus -- behind the wood burner, covered by the protective mat, we discovered another heat register!


As you'll see in the pictures, we did even a bit more -- on Boxing Day, my family came up to spend a day just hanging out at the farm, so Chris and I went up early and set up the dining room table. This had been the table and chairs from our house, which we replaced... a year or so ago?... and have had sitting around waiting for the dining room at the farm to be ready for them.

Wood stove in progress and completed...

Patching in progress and (mostly) completed...

We may still make it up there one more time before it's technically 2019. There's hope that the dining room might get primed yet this year. But basically, it's looking like the end of projects for 2018.

Here's hoping that 2019 brings
  • A completed chimney removal, roof repair, and wall (re-)instillation in the space between the dining room and kitchen
  • An end to the upstairs bedroom project that was literally one of the very first things we started
  • More project wrap ups
  • Less bats

Thursday, November 22, 2018

Thanksgiving 2018

We've owned the farm for (very slightly over) two years now, and while we still have a lot of projects to work on, we've continued to be pleasantly surprised by how smoothly most projects have gone. It has really been a fun project overall, and we have a lot to be thankful for. In no particular order, here's our farmhouse top 10 list for Thanksgiving.

1. Heat
Seriously, heat is great. We've been lucky to have the wood burner since the beginning that really kicks out a lot of heat, and how we're going to be extra toasty with central heat that we can schedule to turn on before we come up. 


2.  Good neighbors
We've been so lucky with our farmhouse neighbors. They're often stopping by in the summer with garden produce for us, and last winter, one of the neighbors plowed a path up our driveway all season so we could get in when we came up. They've shared what they know about the place, and the guy across the street even took us on a tour around the area. 

3. The front porch was saved
You may remember that I was prepared to cry if we had to lose that nice stone porch, so I'm definitely thankful that not only were we able to support and save it, but improve the steps so that the whole thing is a charming place for some quality front-porch-sitting... in those few moments we have for just sitting around.


4. Doors that open
It seems weird to be thankful for doors that basically just do their job, but in a house where we didn't get any keys at closing, everything's not-quite-straight, and most of the doors are at least a little sticky, we're definitely glad to be at a point where all available doors can be opened, closed, and (where applicable) locked. 

5. People pitching in
From the first moment that Tony Bucket hurried back from his dinner so we could write up an offer on the farmhouse before heading home, people have been lovely about helping to make this happen. My father, of course, has been basically a rock star. He's been ready to help with any project, and always does a careful and beautiful job. My mom has stripped wallpaper and painted. My sister has come from out of town to strip wallpaper and refinish windows. I think just about everyone in Chris's family has been part of the ongoing project to move the leftover rocks away from the front porch.


6. History lessons
One of the most fun parts of the farmhouse is that people seem to enjoy telling us about what the place was like before we owned it. We've had a former resident come for a tour and to share her stories. The neighbors are always a good source of information about what's been done and when. One of my coworkers is even the nephew of the man we bought it from. We have a lot of fun walking people through the place and listening to them share what they remember about how it used to be.

7. A roof over our head
The farmhouse roof is steep and can't be stepped on, making it one of the more terrifying parts of the house. Despite that, we've been able to get up to make the necessary repairs to keep the water (and sometimes the bats) out.


8. Hyacinth Bucket (van)
We would definitely not have made the progress we have without the bucket van. We've done roof repairs. We've scraped and painted. We've removed and replaced storm windows. We've moved in a boxspring. We've picked apples. We've repaired a chimney. And through all of that, we haven't had to worry about falling off ladders. Seriously, that van is great. 10/10, would buy again.

9. We can actually vacation at the farm
We have a functional kitchen, a television, and two complete bedrooms. We have a working bathroom and a window a/c unit. We're finally at the point where we don't have to necessarily hustle every single second of every single visit to the farmhouse, and that's a very good feeling, indeed.


10. The water's still flowing
Even when we winterize, we have a steady outflow of water. We've cleared the ditch a bit, and we may have successfully found the outflow for the basement floor drain (which may mean less basement flooding in the future?). In a world where even pretty nearby, access to clean water isn't a guarantee, the fact that we have water that literally is constantly flowing through our house at all times is pretty great.

Happy Thanksgiving, all.

Monday, September 24, 2018

Opening Doors

When we first looked at the farmhouse, one of the things we really liked is that it still had a lot of the old fixtures and detailing, including the door hardware. The downside to this was that this door, going from the front porch into the parlor, was unopenable. We weren't sure if the door was just totally jammed shut, or if it was locked using the skeleton key (which we didn't have anyway).

Antique security system: the doors just don't open.
Then, this summer, we discovered that Chris's father had a whole bunch of skeleton keys that he'd picked up over the years. This made the strategy of randomly trying keys to see if they'd fit the lock seem a bit more reasonable -- or at least less like we'd have to start by purchasing a whole bunch of keys that probably wouldn't work. So, off I went, keys in hand.

I started out trying all the keys, but it seemed like there was potentially some issue with the lock mechanism itself -- a few keys felt like they were trying to push against something, but the lock wouldn't budge. So, I decided to go back to the option of brute force, just in case that worked. It wasn't an especially humid day, which was good, because it turned out that the answer to "why doesn't the door open?" was just that it was swollen (and a little bit painted) shut. A little finessing and scraping, and then some mighty shoving, got the door open.

Probably the first time in at least 15 years this door has been open.
Now the door was open... which put the pressure on to find a way to be able to lock it again before I went home. Fortunately, with the door open, I was able to take out the lock and discover why it wouldn't work: it was full of dirt and rust.

Ewww.
This was a problem for WD-40. I had that. In the end, the entire lock had to be taken apart, cleaned, lubed up, and put back together... at which point, it turned out that one of the keys in the Random Bag O' Keys actually did fit our lock!


With this success under my belt, I took apart and cleaned the lock on the door from the porch into the kitchen -- it was also disgusting inside, and the same skeleton key fitted that lock. In fact, the same key also opened our interior doors, like the door to the upstairs. There's still a bit of work to do on these -- the striker plates don't line up well with the door mechanisms (not sure why... are these door handles actually replacements?) and the doors still need some planing before they'll open well during the worst of summer heat and humidity, but we now officially have keys to the house!

Tuesday, September 18, 2018

Then The Chimney Fell Over

Just to stay honest about the timeline here, the following incident occurred almost exactly a year ago, in September of 2017. We had gone up to the farm, but didn't have much time to work on things... and we discovered this:

Santa's not getting down THAT chimney...
This was especially not good because of all the chimneys you see here, the one that fell over is the only one that actually gets USED. The one to its right isn't even attached to anything; the one to its left is still kind of an unknown quantity. But this chimney belongs to the wood stove that keeps us from fully turning into icicles when we're working at the farm during the winter.

Unfortunately, we really didn't have time to deal with the chimney, so we stuffed rags down the hole to keep out critters and went home to make a plan and gather supplies.

The good news with this project was that nothing substantial was actually broken. The chimney had a number of guy-wires stabilizing it, and those wires were not even remotely an appropriate strength. After many years of service, they'd just given out, and without the extra stability, the chimney blew over. While a few tiles got a bit cracked, there wasn't even much damage to the roof.

The bad news with this project is that chimneys are heavy and tall, and there was absolutely no way that puny humans standing on the lean-to roof were going to have the strength or leverage to lift the chimney back into position. Fortunately, these puny humans have a bucket van, and we were able to get a strap around the upper part of the chimney, attach the strap to the bucket, and then maneuver the bucket to lift and position the chimney. A bit hair raising? Yes. Ultimately successful? Also yes.

Standing tall
With the help of some new -- much more substantial -- guy-wires, the chimney got secured back in its place, where it will hopefully stay for years to come.

Monday, September 17, 2018

Curb Appeal: We Have It (Now)

So, when last I was posting, I believe the exterior of the farmhouse looked about like this:

Already better than when we bought it.
Since then, a LOT of things have been done to the outside of the house, and I have to say, it's looking pretty darn spiffy. For one, my dad painted us a faux-window to even out the visual balance of the big window into the parlor.

Symmetry. It's a good thing.
We also got the weird bit of siding over the front porch primed and painted so it would match better with the actual siding.


We also got the lean-to painted to match, and repainted the trim. But the biggest improvement is that my dad rebuilt the porch steps, using the old stones to create new pillars. It was a huge job -- the old steps had to be broken up with a jackhammer, and there was a LOT of debris to clear away -- but the result makes an amazing difference.

So nice!
That sidewalk was an unexpected bonus -- while he was clearing out the porch debris, my dad uncovered the pad at the bottom of the steps. It looked like it kind of disappeared into the grass, and after a lot of digging, Chris discovered a sidewalk that goes all the way around to the lean-to!

Just recently, we were at work on the porch again, but this time, we were just cleaning. Cleaning the cedar siding along the back wall of the porch had probably last been done... never. So just a little elbow grease made a visible difference.

Unwashed on top. Washed on bottom. Yes, that's a backward way to clean.
This past weekend was sunny and warm, with no rain in the immediate forecast (it's been a surprisingly rainy summer this year), so we were able to get out and seal the wood -- the walls and the new steps and the porch swing -- and the masonry, which will hopefully help protect the mortar against future weathering.

It's like a real house!
We're pretty pleased with how things are looking -- and so are the neighbors. We've had a lot of comments about the snazzy new porch steps, and everyone agrees it looks a lot less like an abandoned, haunted house than when we first bought it.

Monday, July 17, 2017

That Time I Didn't Die


The best thing we have purchased for this farm so far is a bucket van.

It's a van. With a bucket.
We thought the bucket van would be a much safer alternative to a ladder when it was time to work on high up places, like the roof, or a chimney, or any of the second-floor-level exterior siding and windows. And it is.

The first thing you should know about the bucket van is that it's pretty fun. Ok, my sister didn't think so, and I'm pretty sure that Chris places it squarely between "better than a ladder" and "not nearly as good as solid ground." But I think it's fun to ride in.

This next photo was taken just before I probably would have gone to the emergency room if not for the bucket van.

But everything looks so calm...
See those two pieces of siding right below my crowbar? Under that siding was bats. I took off one piece of siding, and a little bat was staring at me like "hey, there used to be a roof over my head..." and then it flew away. Then I pried up the next piece of siding... and seriously about seven bats dropped out and zoomed away. And when bats suddenly come whooshing out of your siding... you jump.

Had I been up on a ladder, I am quite certain I would have jumped two stories down. In the lovely bucket van, though, I jumped about a foot, which brought me to the other side of the bucket, safely enclosed by the high sides.

Have I mentioned I really like this van?

Not only did the bucket lift help keep me safe, but it allowed us to make pretty short work of the rest of the siding on this end of the house. Just three more sides to go!


Tuesday, July 11, 2017

This Place is a Dump; or, What's Under That? Lawn Edition

So, one day, Chris asked me to fill up some buckets from an ash pile out in the lawn so that we could use the ash to fill in some holes elsewhere in the lawn. Yes, the lawn is incredibly uneven.

I started to dig... and it quickly turned out that this was not just an ash pile. It was a burn pile. As in, the place where previous owners dumped their garbage and then burned it, either in the days before or as a free alternative to municipal trash service.

The thing is that those previous owners didn't just put things in the pile that would actually burn. For instance, glass. I filled about two five-gallon buckets with broken pieces of glass, and that's only digging down about 3 - 4 inches in a space about the size of a twin bed.

And speaking of beds...


I also pulled out a boxspring? mattress? one excrutiating coil at a time, including at least two times when we had to hook a loop of metal coil over the hitch of the truck in order to pull it out from the ground.

This past weekend, Chris finally (and bravely) took a rototiller to that area, which -- in addition to evening the ground out quite a bit -- turned up even more broken glass and a few more coils of bed. Guess we'll be embarking on another archeological dig through the recent past soon. At least we don't have to come home, carefully wash it all, and then try to reassemble all the pieces in order to learn about the previous occupants...

Sunday, July 9, 2017

Shed Flip-Flop

So far, I think this is the most fully completed project, in that it's actually all done and not just advanced to a new stage of needs-to-be-worked-on: Chris turned the shed around.

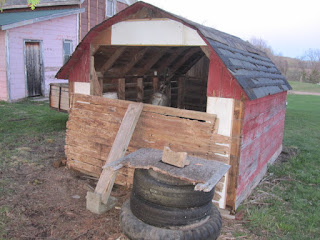
This, you may recall, was the shed as viewed from the road.


It was basically fine, but Chris decided that it needed a door for added security. And a lean-to, for added storage. And for the door to face the back of the property, for a bit of additional security and privacy.

Spoiler alert -- at no time did we actually move the shed in order to achieve these goals.

Flip-flopped!


Instead, Chris just took off all the siding on the back of the shed, moved it to the front, and vice versa. A relatively simple inversion! Then it was just a matter of building a door and lean-to out of scrap boards (of which we're gathering a fairly large collection) and putting up a section of fence to keep the neighbors from having to look at our storage.

Shed -- now with working door!

Building supplies -- now out of the neighbors' view!
View from the back

I think the new inverted shed looks a lot more put together now that you don't pull up to the house and immediately find yourself staring into its dark recesses. And I guess I lied just a little earlier -- the shed does still need a fresh coat of barn red paint, so it's not quite "project complete" just yet. That should only be a quick hour or so of work, so hopefully it's a project we can check off the list fairly soon.