Showing posts with label yellow room. Show all posts

Tuesday, September 24, 2019

We Also Did Some Finish Work

At the farm, there is pretty much always something that you could paint. This year, we have painted...

The trim in the living room

Yes, it's basically the same color as the old trim.
All sorts of exterior trim

Love that bucket van
And, over Labor Day weekend, the back wall of the dining room and the doorways!

Blue!
We also painted the ceilings in both the living room and the dining room, which was an absolute nightmare. In the future, remind me how much I hate painting over my head.

We also got some new furniture, which is at least exciting for us.

In the master, we found a dresser at a barn sale and some nightstands in my best friend's storage unit.

Now we don't live out of suitcases. It's like we're civilized or something.
That allowed us to move the little dresser up to the yellow bedroom, which is now pretty overnight-guest-worthy.

Who's coming to visit me?
We also got a barrister bookcase for the living room, which I apparently don't have a good picture of. And then... we got a wardrobe.

The thinking with the wardrobe is that in the bedrooms upstairs, there isn't really any good storage space -- there are no closets, and the room you're seeing above is the big one -- the others are going to be lucky to get more storage than a nightstand. So we figured one wardrobe in the hall would give some shared space to hang things up, etc.

We measured. Then I went out to Massachusetts with the aforementioned best friend to do some antiquing. We found many fascinating things that were not wardrobes.

Not a wardrobe

Perplexed Bigfoot is not a wardrobe.

Terrified goat head is not a wardrobe.

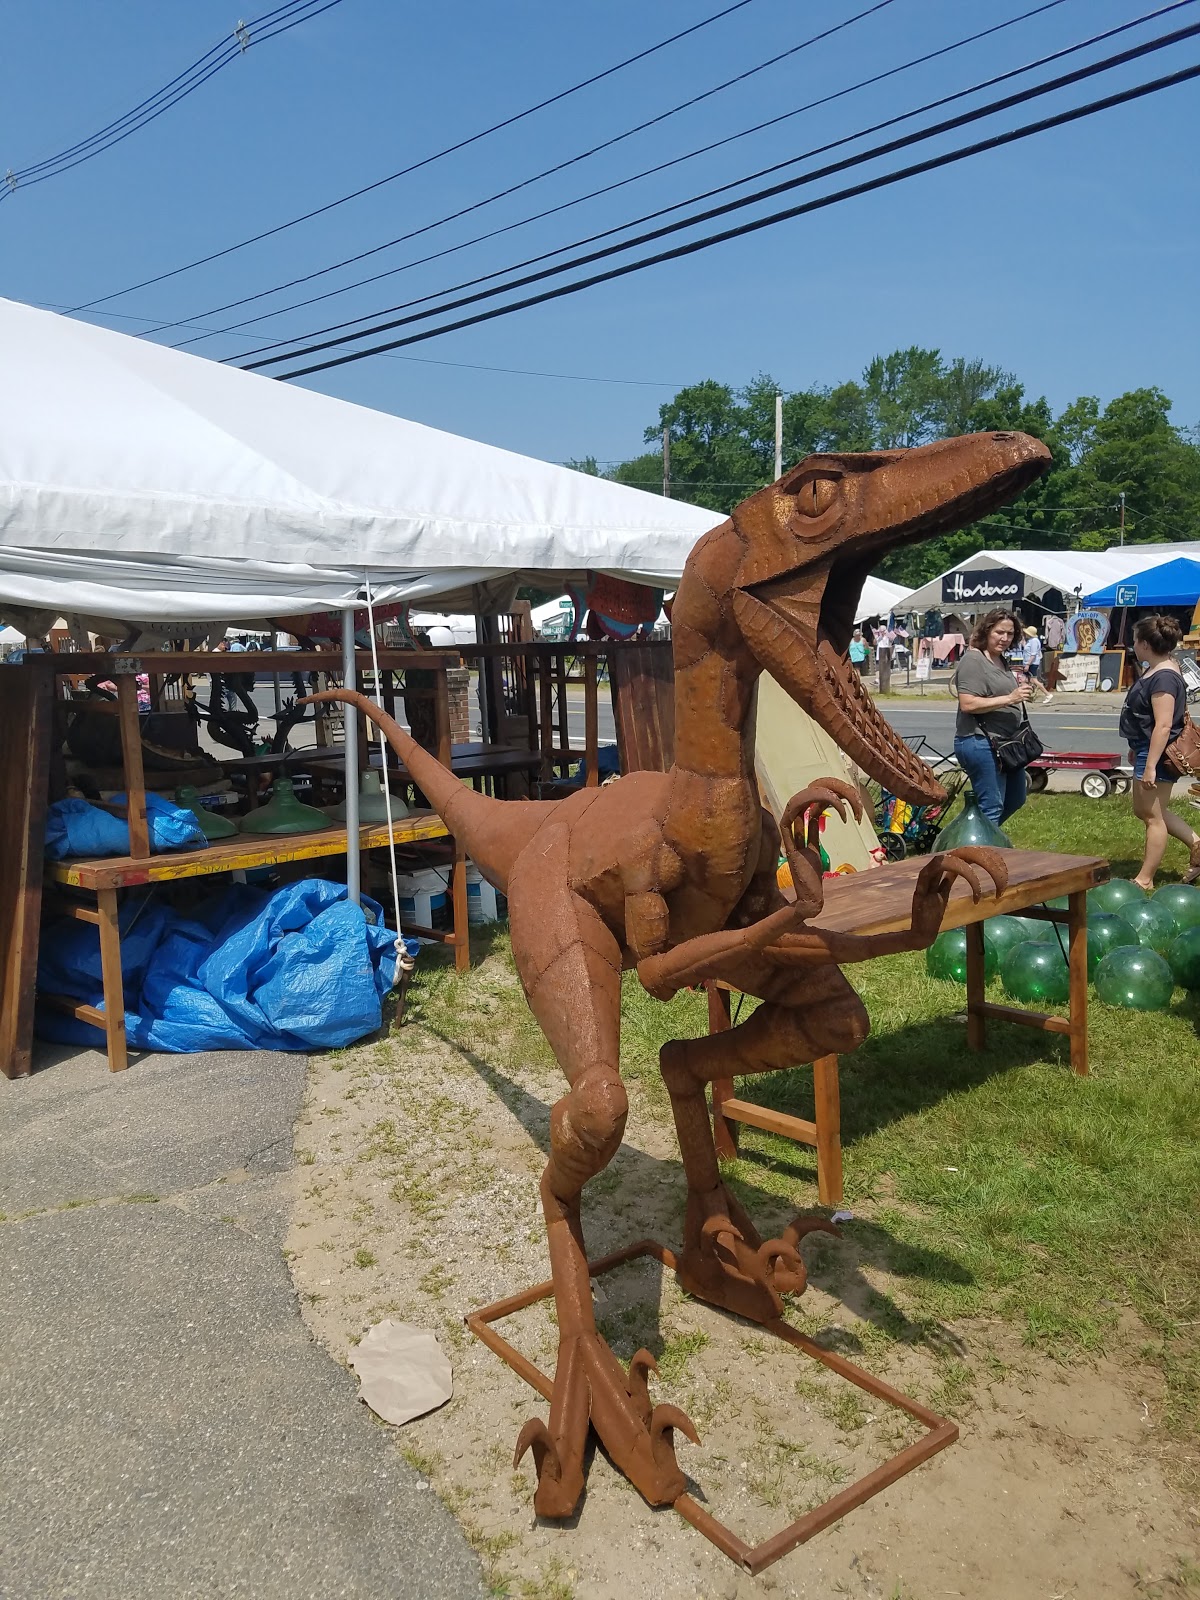
Garden-art velociraptor is not a wardrobe. I don't know how this didn't come home with me.

I don't know what this is, but it isn't a wardrobe. I hope.
 Then, after much searching, I found a wardrobe! It was the art-deco style Chris likes! It would fit in the space! And that was when my BFF said "well, if THAT'S the kind of thing you're looking for, I have one in my storage unit. I actually have two."

So then I came home and bought hers. And we measured it. We really did. And we decided it would just barely fit in the space... and then we got it up to the farm, and into the living room... and decided we weren't actually sure how to take it up the stairs.

After some false starts, during which we each ended up having to climb onto and over the wardrobe while it was half in the stairwell, we took off everything that would come off.

Now with 100% fewer doors and drawers!
At that point, we were just barely able to carry it up the stairs, slide it along the hallway, and shimmy it into position, where it is, as measured, a perfect fit with roughly one inch to spare.

Narnia not included.
So now if you visit us at the farm, you could hang things up, if we had hangers up there, which we don't. Note to self: take a few hangers up next time.

Friday, September 21, 2018

In Which We Very Nearly Finish Something

Good news for anyone who wants to come help work on the farm: we now have a guest room, so we can hold you hostage and ensure you don't leave until the work is complete. You won't have a door on the bedroom, but you won't care because you'll have the whole upstairs to yourself. And you'll have to walk through the construction staging area that's the upstairs hallway in order to get to the bathroom at night, but that's just part of the experience.

Or you could just look at these pictures.

So, a long time ago, we had done the baseline work for the back bedroom: painting the walls and the floor.

Not featured: the floor paint
Well, now we've finally made real progress in this space. For one, you can see in the picture above that the baseboards in this room were incomplete. They were also unpainted 2x4s. All the rest of the upstairs has the wide baseboards you can just barely see behind the paint cans in the hallway. So during our Fourth of July week at the farm, we broke out some wide boards and finished the baseboards for that room.

Cutting mitered angles is the worst.
 We went with the process of "measure twice, overthink about whether or not you're cutting the right end of the board, measure a few more times, cut once, dry fit, measure again, trim down."
Oooh! Wide!
That little bumped out bit was a little tricky because (of course) it isn't smooth, which is probably why the previous folks never bothered finish the baseboards. Once we got the boards in place, it was time to paint and caulk the trim. I have to say that one thing I've definitely learned from our farm projects is that nothing makes a job look quite as complete as some well-placed caulk.

Houston, we have baseboards.
At this stage, we had a complication. The goal was to put a queen-sized bed in this room. We did the measuring, and it would be a bit tight, but doable. So we got a bed... and then realized that taking a queen-sized boxsprings up the steep staircase with a low header was so tight as to not be doable at all. My dad suggested taking first few stair treads off, but when we tried that, it quickly became apparent that we'd actually have to take off about half the staircase worth of treads.

Seriously, this van is the best.
So, we took out the window, put rope around the boxspring, and used the bucket van to take it in through the window. Ridiculous? Maybe. Effective? Absolutely. Since we had the window out, we went ahead and repaired the sashes, reglazed the glass, etc. Now we have something that's looking like an actual bedroom for actual people to stay in!

Never fear -- we have since added pillows.
You can't quite see it in this photo, but we still need to get the light fixture in place (but we have one) and then the aforementioned door needs to be painted and hung, but this room is awfully close to finished! It's actually more finished than the master in some ways... maybe we need to start sleeping up here while we paint downstairs.

Wednesday, February 8, 2017

What's Under That? Flooring Edition

We're finding that one of the joys of buying an old house is the ongoing game I call "What's Under That?" The rules of the game are simple: one person identifies an aspect of the house and says "I wonder what's under that," and then all players start removing layers in order to answer the question. Depending on the surface, this game can have multiple rounds on the same surface.

We started this playing this game literally about fifteen minutes after closing on the house (and that's only because we had to drive back across town to get to the farm).

Originally, all the upstairs bedrooms were carpeted. The carpeting in the green room was fairly normal, but the other two rooms had something with a more woven texture that I'd be more likely to call a "rug." I'm not really sure why I feel like there's a distinction between "rug" and "carpet" in a situation where it covers a room's floor entirely, but you'll see what I mean (I hope).
This is a "rug..."

But this is "carpet."
Fortunately, neither rugs nor carpet was actually installed with any skill; basically, they were all just cut to size and laid on the floor; in the green and paneled rooms, the carpet was stapled or nailed down right by the doorway in order to keep the door from snagging on it. Other than that, carpet removal was easy -- I just rolled it up.

In the back bedroom, that was all there was to it. I rolled up the rug, swept up the layer of dust, and found the wood floor. You can see in the picture below that the floors are partially painted; apparently, that's not uncommon; why waste perfectly good paint (and labor) when you're just going to put a decorative rug in middle of the room?
Back bedroom without carpet
In the front bedrooms, though, the game continued: What's under the carpet? Linoleum.
Some of that nastiness is dust. Some of it really is the pattern of the flooring.
Yes, the thing on the floor in the above photo is the rug. See? You couldn't ball up a room full of carpet like that.
This linoleum was at least a little better looking.
Fortunately, the linoleum wasn't installed any better than the carpet had been -- once again, this was just a roll-and-remove job in both rooms. And what's under the linoleum? Ah, there's the wood floor we've been looking for!
This room looks a lot MORE paneled now that everything is wood.

This one, however, looks a lot less green. Much better!
The best part of this project was discovering that the upstairs floors are in excellent shape. They have a mix of wide and narrow floorboards that's apparently pretty common in old homes -- you kept the good materials downstairs, and in the more private spaces upstairs, people might just use what they had left over. The floors have all seen paint in their lifespans, and the plan is just to scrub them up really well and paint them again so the whole upstairs is uniform in floor color.

In fact, the upstairs floors went so well that I went downstairs to the master bedroom and decided to play again. Certainly the tiles that had been laid in the master weren't original to the house, so what was under those?
You don't have to be an expert on 1880s decor to know this isn't original.
 Sadly, these tiles had been installed using actual technique and materials, so this round of the game involved a lot of scraping. Chris took over this portion of the project because his (literal) strengths were more suited to the intensity of the scraping involved. As of right now, almost all of the tile is gone.
Much better.
We think that both the age of the tile and the cold (it's winter in Michigan, and the farmhouse is unheated this winter since "new furnace" is on the to-do lost) worked in our favor because both tile and whatever is adhering it to the floor are fairly brittle. It's a lot of work, but it comes up in surprisingly big chunks. This floor will need more love -- thanks, adhesive! -- but still should mostly be a matter of sanding it down to smooth things out and then staining or painting.

I'm hoping to play this game again in the parlor, where the floors are almost certainly a match to what's in the master bedroom, just without the layer of tile (we think -- we did have a peek under the carpet, and it looks like a straight shot to the wood). Chris likes carpet, but it's just so worn out and threadbare in all the main traffic areas that I'm still hoping to see it go even if it cleans up ok.

We'll also have to play this again in the kitchen and dining rooms once the chimney comes out and we're able to take out the weird pieces of wall/closet that currently divide the spaces. The floors don't match, and there's currently a bit of a threshold between them, so that will have to get matched up eventually. For now, we've still got that little bit of master bedroom to uncover, and then a lot of finishing to do before this project is complete.

Monday, February 6, 2017

The Basic Tour Continues: Upstairs

If you need to review the main floor, you can check it out here.

All caught up? Then on we go. Let's imagine we're back in the parlor.
Stairs!
In the parlor, right around the corner from the doorway into the dining room, is a door that takes you upstairs to the three additional bedrooms and the bonus attic room.
Upstairs landing
Directly ahead is the first bedroom, which we're calling the "green room." Next to that on the left is a second bedroom, and across the hall (so, behind the wall on the left in this picture) is the back bedroom. You can just see a door on the right in this picture, and that's what leads into the bonus attic space that's over the dining room and kitchen.
Bonus room in the attic
The bonus attic room is quite large, and we're not really sure yet what we'll end up doing with it. So far, Chris has done a lot of work just to clean it out and repair the rafters in this space. In the middle of this picture, you see the chimney that I mentioned in the last post -- it's being supported by a closet in the dining room, but it's not in use as a chimney anymore, so it'll be coming out in order to open up the space on the first floor.
Green room
Here's the green room, named for pretty obvious reasons. This is a "day one" photo, so there have already been updates to this space.
Paneling room
This paneled beauty is the bedroom next to the green room -- both of these bedrooms overlook the front yard. Again, lots of work has been done here. This picture already doesn't show the flooring that was in place when we first purchased the house.
Back bedroom
Last one -- this is the back bedroom. It's in the best shape of all the rooms in the house, so probably not a lot of work will end up going into that space.

And that's the farm! Now you can have a sense of where we are as future posts come up.