Showing posts with label kitchen. Show all posts

Tuesday, September 10, 2019

Chim-Chiminey, Chim-Chiminey, Chim-Chim-Cheree

One of the very first projects we anticipated when we bought the farmhouse was taking down the extra chimney. From what we could tell, it maybe wasn't in great shape, and more importantly, it served absolutely no purpose.

The chimney on the left is purely decorative
At one point, the chimney may have served a cookstove in the kitchen, and we know that it once served the wood burner that's still in the house. But prior to our ownership, the wood burner got moved to the dining room and got a new chimney (which featured in its own blog post last fall). To keep the chimney from collapsing into the house, the previous owner decided to just put in a small closet, which is clearly to code.

We almost did this project last summer, but the threat of rain coupled with some indecision about exactly HOW we were going to get up there and remove the chimney when the roof is fairly steep and also you can't step on it because you'll crack the tiles. That meant that by THIS summer, we'd had a full year to prepare our game plan and gather supplies.

And it turns out... that actually paid off.

First, we got ladder hooks, which are pretty much what they sound like -- they attach to the ladder and allow it to slide up the roof and hook over the ridge, distributing the weight of the ladder. Like so.

Testing the ladder hooks
Then my father brought up ladder jacks, which look like they should be used as bear traps or something, but actually attach to the ladder and allow you to set boards across the two ladders to make a flat, stable platform. For added safety, we had harnesses tied off to the bucket van. So from there, dad and I were able to spend a morning up on the roof, trying to gently take out the chimney without dropping bricks or loose mortar onto the roof tiles. Chris took the hard job of trudging up and down ladders all day to haul down the bricks and mortar we removed.

The actual taking down of the chimney was not significantly harder than playing Jenga. A fairly light tap with a hammer was enough to loosen up most of the chimney, and bricks came out with basically no effort.

By the time we were reaching through the roof into the attic, however, the whole chimney was swaying significantly every time you touched it. That didn't seem great, since we didn't really want to knock down ten feet of chimney into the attic. When we regrouped inside for further demo, Chris and Dad rigged up a couple boards to brace the chimney a bit... and then the rest of the chimney was also super loose and in about the same amount of time it took to measure, find boards, and screw in the braces, they'd taken down the chimney past the point where the braces were helpful.

Good-bye, chimney.
Soon enough, we were finding the tools that had been dropped down the chimney earlier, shockingly well-preserved bird skeletons, and a lot of years of soot and dust and dirt and general nastiness that had to get scooped out. But eventually, we reached the kitchen!


Yes, this is the "closet" that was supporting the chimney.

I'm standing in the kitchen, looking up to the hole in my roof.
So then the chimney was gone, and we were left with a hole in the roof, which is the downside to removing a chimney. Fortunately, this was easily remedied.

No more skylight!
This was the point where we decided to be smart and let this be a two-day project. The next day, we were sore, but back at it. After a little aerial YouTubing, we figured out how to use a slate ripper, which is a tool that looks like it's not going to do anything, but somehow manages to slip up between roof tiles and rip out the nails so you can remove a tile without having to remove every single tile that overlaps it. Then we set about taking out the partial tiles, installing new tiles... and fixing the tiles we accidentally broke with the ladder. Oops.

New tiles!
Finally, it was time to splice in some new metal over the ridge, re-attach the lightening rod assembly, and ta-da! -- a totally fixed up roof!

Roof, now with less chimney!
From up close, it's pretty obvious which tiles are the new ones, but from the ground, it's like the whole chimney never even happened.

No chimney!
All in all, this was one of the more rewarding projects. Once we took the chimney down in the attic, for instance, we were able to get in and finish up the insulation project from the last post. Having the chimney out is also going to let us (hopefully yet this fall/winter??) move ahead with putting a wall back in between the kitchen and dining room. So I guess the "reward" here is more projects, but it still felt really good to get this big one done.

Saturday, December 29, 2018

Final 2018 Projects?

Well, 2018 wasn't quite as productive a year as we might have hoped, but we had another good push on projects here in the 11th hour. Now that we have heat, December was actually a little project marathon.

First, we wanted to keep all that lovely heat inside. Most of the windows have storms, but a few didn't, so Chris built new storms for those. We also moved the storm door that was previously on the (modern) door between the kitchen and the lean-to out to be on the (original) door into the parlor; Chris also added plexiglass to the dining room screen door for some additional insulation.


Probably the biggest end-of-year project was painting the parlor. It was covered in wood paneling, which over the years had taken on a decidedly greenish tinge. Plus, we'd patched in a fairly large section where the front window no longer existed, and that paneling was darker and less green, so the whole thing was looking a bit shabby.

This took forever (ok, it took basically one full day) because of all the trim and because we had to brush every single groove in the paneling where the roller wouldn't reach. In the end, though, the room looks so much brighter and fresher!

Also, we put up some Christmas decor. Because Christmas.
The TV is sitting on an impromptu project -- it used to be on a rickety folding tray that was barely big enough to support it, and we'd picked up this old radio cabinet at an auction way back when we bought the farm. It's been sitting in the lean-to ever since, but Chris got a quick coat of polyurethane on it, and now it's all shiny and doing its job holding up the television (and providing a little much-needed storage). 

The next day, we had dueling dining room projects: I was patching the plaster, and Chris was turning the wood burner so it didn't stick out into the room so much. As you might expect, both of those seemed like they were going to be quicker projects than they really turned out to be. But we did get an unexpected bonus -- behind the wood burner, covered by the protective mat, we discovered another heat register!


As you'll see in the pictures, we did even a bit more -- on Boxing Day, my family came up to spend a day just hanging out at the farm, so Chris and I went up early and set up the dining room table. This had been the table and chairs from our house, which we replaced... a year or so ago?... and have had sitting around waiting for the dining room at the farm to be ready for them.

Wood stove in progress and completed...

Patching in progress and (mostly) completed...

We may still make it up there one more time before it's technically 2019. There's hope that the dining room might get primed yet this year. But basically, it's looking like the end of projects for 2018.

Here's hoping that 2019 brings
  • A completed chimney removal, roof repair, and wall (re-)instillation in the space between the dining room and kitchen
  • An end to the upstairs bedroom project that was literally one of the very first things we started
  • More project wrap ups
  • Less bats

Thursday, November 22, 2018

Thanksgiving 2018

We've owned the farm for (very slightly over) two years now, and while we still have a lot of projects to work on, we've continued to be pleasantly surprised by how smoothly most projects have gone. It has really been a fun project overall, and we have a lot to be thankful for. In no particular order, here's our farmhouse top 10 list for Thanksgiving.

1. Heat
Seriously, heat is great. We've been lucky to have the wood burner since the beginning that really kicks out a lot of heat, and how we're going to be extra toasty with central heat that we can schedule to turn on before we come up. 


2.  Good neighbors
We've been so lucky with our farmhouse neighbors. They're often stopping by in the summer with garden produce for us, and last winter, one of the neighbors plowed a path up our driveway all season so we could get in when we came up. They've shared what they know about the place, and the guy across the street even took us on a tour around the area. 

3. The front porch was saved
You may remember that I was prepared to cry if we had to lose that nice stone porch, so I'm definitely thankful that not only were we able to support and save it, but improve the steps so that the whole thing is a charming place for some quality front-porch-sitting... in those few moments we have for just sitting around.


4. Doors that open
It seems weird to be thankful for doors that basically just do their job, but in a house where we didn't get any keys at closing, everything's not-quite-straight, and most of the doors are at least a little sticky, we're definitely glad to be at a point where all available doors can be opened, closed, and (where applicable) locked. 

5. People pitching in
From the first moment that Tony Bucket hurried back from his dinner so we could write up an offer on the farmhouse before heading home, people have been lovely about helping to make this happen. My father, of course, has been basically a rock star. He's been ready to help with any project, and always does a careful and beautiful job. My mom has stripped wallpaper and painted. My sister has come from out of town to strip wallpaper and refinish windows. I think just about everyone in Chris's family has been part of the ongoing project to move the leftover rocks away from the front porch.


6. History lessons
One of the most fun parts of the farmhouse is that people seem to enjoy telling us about what the place was like before we owned it. We've had a former resident come for a tour and to share her stories. The neighbors are always a good source of information about what's been done and when. One of my coworkers is even the nephew of the man we bought it from. We have a lot of fun walking people through the place and listening to them share what they remember about how it used to be.

7. A roof over our head
The farmhouse roof is steep and can't be stepped on, making it one of the more terrifying parts of the house. Despite that, we've been able to get up to make the necessary repairs to keep the water (and sometimes the bats) out.


8. Hyacinth Bucket (van)
We would definitely not have made the progress we have without the bucket van. We've done roof repairs. We've scraped and painted. We've removed and replaced storm windows. We've moved in a boxspring. We've picked apples. We've repaired a chimney. And through all of that, we haven't had to worry about falling off ladders. Seriously, that van is great. 10/10, would buy again.

9. We can actually vacation at the farm
We have a functional kitchen, a television, and two complete bedrooms. We have a working bathroom and a window a/c unit. We're finally at the point where we don't have to necessarily hustle every single second of every single visit to the farmhouse, and that's a very good feeling, indeed.


10. The water's still flowing
Even when we winterize, we have a steady outflow of water. We've cleared the ditch a bit, and we may have successfully found the outflow for the basement floor drain (which may mean less basement flooding in the future?). In a world where even pretty nearby, access to clean water isn't a guarantee, the fact that we have water that literally is constantly flowing through our house at all times is pretty great.

Happy Thanksgiving, all.

All Mod Cons pt. 2

So, this is finally an update to a project that has been (sort of) underway since Labor Day weekend. That weekend, we had planned to remove the excess chimney, but it turned out we didn't have quite the tools we needed and weren't quite sure the weather was going to be good enough to warrant putting a hole in the roof. So instead, we tackled the furnace.

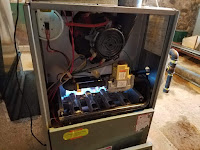
First, there was the matter of unhooking and removing the old furnace. We were anticipating that this might be a huge, heavy job... but surprisingly, it mostly wasn't. It came out easily, and while taking it out the back stairs was awkward, it was significantly easier than when we attempted to do the same thing with the old water heater.

Out with the old!
Then we were faced with the somewhat more daunting task of getting the new furnace installed. This furnace had come out of our primary house when we had that furnace replaced over a year ago, so it had been sitting in the farmhouse basement for awhile surrounded by random pieces of ducting that we hoped would be useful. The initial work took most of an afternoon with my dad getting the gas lines run around to where the new hookups were, and Chris and I trying to figure out how to put a square peg in a round hole -- a.k.a., getting the old duct work to align with the new furnace.

In with the new(er)
By the end of the day, we had everything pretty roughed in, but it took Chris and I a few more weekends to get everything really set to go. Then there were some other matters to attend to. For one, the house wasn't that clean when we moved in, and the furnace hadn't been run in something like 2 - 15 years, so we were confident that if the ducts were just full of dust, we could count ourselves lucky.

We initially thought that we might be able to tape some rags onto the end of chimney sweeping poles and run those through the ducts, but we quickly discovered that even a much more flexible piece of PVC just wasn't flexible enough to make the nearly 90 degree angle through the vents. Fortunately, then Chris realized that we had a very long hose that was exactly the same size as the hose on the shopvac (the hose had previously been employed draining the flooded basement). So we attached that to the vacuum, and down the holes it went.
This job sucks.
Then there was the matter of the chimney itself, which we weren't positive was actually open, which is an important part of the function of a chimney. We kept hoping to get a friend with a drone to come up and look at it for us, but then Chris answered the question in the way that people presumably answered this question for centuries before drones came along... we stuck a mirror into the chimney and looked up.
Then it comes to be that the soothing light at the end of your tunnel is daylight coming through the chimney opening.
The chimney was open. The ducts were clean-ish. Everything was installed. Chris and one of his buddies even stopped up one day and brought the stove in from the lean-to where it had been languishing for the past year and a half.
Just like a real kitchen!
So, yesterday was the moment of truth... we scheduled DTE to come out and turn on the gas. In an unexpected turn of events, they said a technician would arrive between 12 and 4 p.m., and he actually arrived by 12:30, making this possibly the most timely service call ever.
DTE said "let there be heat!" And there was heat. And it was good.
The furnace was the easy part. Despite having sat for quite awhile, it fired right up and immediately started pumping lovely heat throughout the house. The initial whoomph did also blow a bunch of nastiness out of the ducts, but... I guess they're cleaner now?

The stove was actually the hard part because when we turned on the gas at the appliance... nothing happened. There wasn't even gas coming through the lines. This was odd, especially since the furnace was already blowing steadily -- a clear indicator that the gas was coming into the house just fine. Chris and the gas technician looked around the basement a few times trying to see if there was another shutoff somewhere, but couldn't find anything. We all stared deeply into the creepy crawlspace that runs under the kitchen, hoping the flashlight would not hit a shutoff valve that would require someone to actually slither under there. We discussed breaking a pipe open to see if a blockage could be discovered by snaking wire through the pipes. Then we all looked one more time, and I found the shutoff, and then everything worked out just fine.
Cooking celebration ramen. As one does.
It should be noted that about 30 seconds after taking the picture above, I had both the coat and hat off because it was warming up significantly in the house.

So that's how it came to be that two years and three days after initially purchasing the farmhouse, we now have central heat and a working range.


Wednesday, September 19, 2018

In Which Life Happens

So, the chimney topple featured in the last post happened in September of 2017. After that, a whole lot of things happened. At the farm, we continued painting on the exterior work already featured in the Curb Appeal post. But a lot of what happened wasn't at the farm at all.

In November, we went to Arizona to visit Chris's dad for Thanksgiving.

This house is in much worse shape than the farm. Nice view, though.
In December, we went to Maryland for Christmas with my sister, where I repaid her for her work on the farm by helping to re-tile the backsplash in her kitchen.

This is the nicest kitchen you'll ever see on this blog.
In February and March, I built my sister a Cyberman head for a cosplay she was working on.

Inspiration.
What happens when you give me bad weather, Styrofoam, and craft paint.

Also in March, I got diagnosed with breast cancer. In April, I had a bilateral mastectomy. The good news is that they believe they got all the cancer. The bad news, at least for the farm, was that I spent a lot of the spring recovering strength and stamina.

In May, the whole family got together in Shenandoah National Park to celebrate my parents' anniversary. I hiked to this waterfall and immediately regretted it, realizing that "recovering strength and stamina" thing was still very much in progress.

Lovely. But not worth it.
And by then, it was basically this summer, which was largely spent patching plaster in the upstairs bedroom (which you already saw). Oh, and then I had sinus surgery, because you can never have too much surgery. So then I was on lifting restrictions again for a few more weeks.

One nice farm-related thing out of all of this was that we also spent some time actually just up there enjoying the farm. We took the cat with us and spent the week of July 4th at the farm, working on some projects, but also getting out into town and just relaxing.

Remnar at the farm.
There are a few more projects from this summer that I'll still update you on, but sadly, a lot of the past nine months or so were spent mostly focused on non-farm issues. Now that we're finally picking up the pace again, the nice weather is fading fast, so we'll see what else we're able to get done before winter.

Sunday, September 16, 2018

Freshening Up the Kitchen

In other projects, we got the kitchen cabinets painted. As you may recall, previously, the uppers and lowers weren't the same color (of course) and the hardware was on the ugly side. Around the end of last July, we started painting the cabinets a clean, slightly-creamy white.

Looks cleaner already.
The doors and drawers got a similar treatment, plus new handles. Much like the window in the last post, this is a project that started last summer, and finally got wrapped up this summer, when I finally put the lower cabinet doors back on. Oops.

Things are getting surprisingly matchy.
Still needed: doors or curtains for the cabinets right under the kitchen sink. And, you know, literally everything else in the kitchen.

Sunday, February 5, 2017

The Basic Tour: First Floor

Seems like it might be time to get a clearer picture of the basic layout of the farmhouse, so this will be just a quick tour with pictures that are as "before" as I can find right now.


You've probably seen this one before.
Ok, let's say you enter through the door you see in the picture above. That's going to take you first off into the lean-to.
Lean-to
The rather see-through wooden door that you're looking directly at in this picture is the door you just "came in" through. The door that's propped open on the left leads into the kitchen. Right now, we're mostly using the lean-to as a staging area where we can store lumber or work on outdoor projects out of the wind.
Kitchen
You walk through that door into the kitchen (so, you just walked in through the door you can't see behind the post on the far right). In this picture, you're looking into the kitchen from the dining room. Eventually, the weird dividing wall between the two will come down, but right now, the closet directly behind the step stool is supporting a chimney that's still in place on the second floor/roof.
Dining room

Wood burner
From the kitchen, you walk into the dining room. These pictures are already pretty "in process" -- the dining room had a drop ceiling when we bought the place, which has already come down, and the walls on either side of the wood burner were previously covered in tongue-and-groove paneling (which was painted white on one side, but not on the other, because reasons). In the picture on top, you can see two doorways. The one on the left leads to the door down to the basement and then to the bathroom, which opens into the master bedroom. The doorway on the right leads to the parlor/living room, which also opens into the master bedroom, so you can walk in a full circle all the way around the first floor.
Parlor
We'll go through the door on the right. This is the parlor. The door you see leads out onto the stone porch in front of the house -- there's a door onto that porch from the dining room, too -- so this is where you'd come into the house if you were fancy (and if the door wasn't swelled shut). We're hoping to put in a bigger window in the spring to fill in that weird space on the wall that doesn't have paneling. This photo is taken from the master bedroom, which is where we'll head next.

Master bedroom
The rooms are fairly small, so they're all kind of hard to get pictures of. This is the master. Through the doorway, you see the parlor -- that weird accordion door is high on the "replace" list. On the left, you can see the tile that was down in the master when we bought the place, but obviously that's coming up in favor of the wood that's underneath. This picture is taken from the bathroom, which you're not going to get a picture of because the rooms are small, so all you can really see is a picture of a fairly standard (and not in any way charming or vintage) tub/shower.

Coming soon -- the tour continues upstairs!

Friday, December 9, 2016

Newfangled Flush Toilets

I don't think of myself as especially high maintenance, but I admit, I really like indoor flush toilets.

A lot.

Don't get too worried -- despite being built in the 1800s, the farm does (now) have a bathroom that's up to modern standards (and maybe just a little too much up to modern styling... but we'll worry about that much, much, much later).

This, however, was the pipe that carried everything away after you flush that lovely modern toilet. It's pretty easy to spot the hole down at the far right, but it may not be as obvious that the entire outside of that bent part is also a big gaping hole. What this means is that anything flushed down the toilet would soon be deposited on the basement floor, which is not even remotely what I signed up for when I bought a house with a bathroom in it.

Fortunately, Chris and his friend Josh spent the better part of a day removing that pipe. That's right. Hours of work, just to get the old one out.

I spent that day up in the kitchen, scraping up the contact paper that someone had put up as if it were wallpaper (which it isn't) in place of a backsplash (which you don't use wallpaper for, either).

This is neither wallpaper nor tile. It is also not an appropriate use for contact paper.

Goodbye.
When we came back the next day, the hard part had been done, so it was just a matter of getting the new pipes all fitted and secured. And just like that, modern conveniences have been restored!

Well, sort of. We're still flushing with buckets instead of using the toilet lever like civilized folks, but that's just because we want to limit the amount of water we put into the system so we don't have to keep winterizing everything. Have I mentioned that it's winter? I feel like that may have come up here before... two or three or ten times. Still. Flushing with a bucket is better than, well, other ways one might use a bucket in a bathroom situation. Viva la plumbing!