Monday, July 17, 2017

That Time I Didn't Die


The best thing we have purchased for this farm so far is a bucket van.

It's a van. With a bucket.
We thought the bucket van would be a much safer alternative to a ladder when it was time to work on high up places, like the roof, or a chimney, or any of the second-floor-level exterior siding and windows. And it is.

The first thing you should know about the bucket van is that it's pretty fun. Ok, my sister didn't think so, and I'm pretty sure that Chris places it squarely between "better than a ladder" and "not nearly as good as solid ground." But I think it's fun to ride in.

This next photo was taken just before I probably would have gone to the emergency room if not for the bucket van.

But everything looks so calm...
See those two pieces of siding right below my crowbar? Under that siding was bats. I took off one piece of siding, and a little bat was staring at me like "hey, there used to be a roof over my head..." and then it flew away. Then I pried up the next piece of siding... and seriously about seven bats dropped out and zoomed away. And when bats suddenly come whooshing out of your siding... you jump.

Had I been up on a ladder, I am quite certain I would have jumped two stories down. In the lovely bucket van, though, I jumped about a foot, which brought me to the other side of the bucket, safely enclosed by the high sides.

Have I mentioned I really like this van?

Not only did the bucket lift help keep me safe, but it allowed us to make pretty short work of the rest of the siding on this end of the house. Just three more sides to go!


Saturday, July 15, 2017

Things I've Painted So Far

Since these rooms aren't really done, I figured a quick process update would be enough. I painted some things.

First, I painted the upstairs back bedroom. It was in the best shape of all the bedrooms, and a fresh coat of paint cheered it right up.

Before
After
Soon the floors and trim will be painted, the light fixture will be installed, the window will be reglazed, we'll find a door for this room... and then it's all decor from there out!

The other painting project was the conclusion of the earlier project of revealing and sanding the floors in the master bedroom.


Scraped and sanded


Painting!

Painted floors
The floors weren't in good enough shape to refinish -- the wood was soft and pretty roughed up in a number of places -- and we figured that painting would have been a more durable and convenient coating "back in the day" than having to routinely wax and/or oil the floors in the private family quarters.

So, two painting projects down!

Thursday, July 13, 2017

All Mod Cons

After spending the winter bucket-flushing our toilet at the farm, it is with great excitement that I reveal that we now have a true flush toilet AND hot running water.

All modern conveniences! Also, I need this sign.
This was not an easy task. First, we (well, Chris) had to do all the initial plumbing repairs in the basement. Then we dragged the old hot water heater out of the basement. Even after we realized it had been sitting there full of water for ten years while the house was empty -- and immediately drained it out -- the thing was still ridiculously heavy. There are no pictures of us pulling it out because we were too busy trying not to be crushed... in the end, we pulled it up the steps with the truck.

The next step was the easiest one -- we hired lovely people to come to our main home and do an HVAC overhaul, which included installing a new hot water heater.

We then hauled our old water heater up to the farm, wrestled it down the steps -- thank goodness for the slightly creepy basement storm door -- and Chris got to work reinstalling the pump for the house, installing the water heater, and fixing joints in the plumbing that suddenly decided it would actually be best if they were leaking just a little. Finally, everything looked good from the basement, so we took our new plumping for a test drive.

"New" water heater


The toilet flushed like it had been waiting for years to be properly flushed. I picked up some bowl cleaner, and got it a bit spiffed up. The toilet has a new seat coming to it still, but it pretty much got right to work.

And then we tried the faucets...

and got nothing.

The water was clearly pumping. We could even hear it move into the pipes. And then... no water. With some trepidation, we asked ourselves... "where is the water going?" There's not that many places water can go, after all, and it didn't seem to be running out inside the walls. We could get water out of the shower head, but not the bathtub faucet. We were left with only one possibility. The water was stuck in the pipes.

To test this theory, Chris opened up the faucet handle on the tub.

I promise, the coloration has been altered a LOT to make it look this grimy.
I've tried to change the tinting on the photo above so you can see a little more easily the gush of water that's coming straight out of the wall where the bathtub faucet used to be. The water was definitely flowing! Now we just had to find a better way to let it out.

We're coming to save you, water! Just hang on!


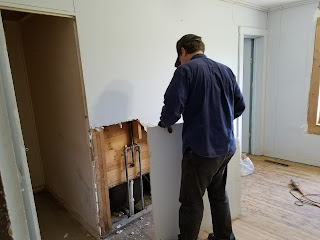
Fortunately, the previous owners had -- we think -- installed a new bathtub, which had necessitated cutting a hole in the wall between the bathroom and the master bedroom. To fix the whole, they had cut a piece of drywall and then, as far as we could tell, gooped drywall mud around the joints with their hands. Chris removed this panel, umm, rather easily.

And indeed -- the water was in the pipes! And the pipes... well, the pipes had been sitting for at least ten years in a house that had not been quite properly shut down. The pipes were clogged with dirt and rust and general gunk. After taking things apart -- not only in the tub, but in the bathroom and kitchen sinks -- and reaming out the pipes, putting them back, running a little water, then repeating the whole process a few more times, we had running water!

Yes, it looks like we have a magical chocolate fountain for a kitchen sink, but don't drink that.
 Ok, so then we did it all a few more times, and then let the pipes flush for awhile. That's more like it. And that is how we came to have hot and cold running water, a functional shower, and flush toilets.

Oh, look! Water from a faucet!

Tuesday, July 11, 2017

This Place is a Dump; or, What's Under That? Lawn Edition

So, one day, Chris asked me to fill up some buckets from an ash pile out in the lawn so that we could use the ash to fill in some holes elsewhere in the lawn. Yes, the lawn is incredibly uneven.

I started to dig... and it quickly turned out that this was not just an ash pile. It was a burn pile. As in, the place where previous owners dumped their garbage and then burned it, either in the days before or as a free alternative to municipal trash service.

The thing is that those previous owners didn't just put things in the pile that would actually burn. For instance, glass. I filled about two five-gallon buckets with broken pieces of glass, and that's only digging down about 3 - 4 inches in a space about the size of a twin bed.

And speaking of beds...


I also pulled out a boxspring? mattress? one excrutiating coil at a time, including at least two times when we had to hook a loop of metal coil over the hitch of the truck in order to pull it out from the ground.

This past weekend, Chris finally (and bravely) took a rototiller to that area, which -- in addition to evening the ground out quite a bit -- turned up even more broken glass and a few more coils of bed. Guess we'll be embarking on another archeological dig through the recent past soon. At least we don't have to come home, carefully wash it all, and then try to reassemble all the pieces in order to learn about the previous occupants...

Sunday, July 9, 2017

Shed Flip-Flop

So far, I think this is the most fully completed project, in that it's actually all done and not just advanced to a new stage of needs-to-be-worked-on: Chris turned the shed around.

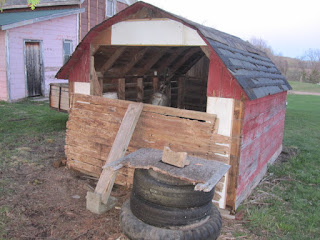
This, you may recall, was the shed as viewed from the road.


It was basically fine, but Chris decided that it needed a door for added security. And a lean-to, for added storage. And for the door to face the back of the property, for a bit of additional security and privacy.

Spoiler alert -- at no time did we actually move the shed in order to achieve these goals.

Flip-flopped!


Instead, Chris just took off all the siding on the back of the shed, moved it to the front, and vice versa. A relatively simple inversion! Then it was just a matter of building a door and lean-to out of scrap boards (of which we're gathering a fairly large collection) and putting up a section of fence to keep the neighbors from having to look at our storage.

Shed -- now with working door!

Building supplies -- now out of the neighbors' view!
View from the back

I think the new inverted shed looks a lot more put together now that you don't pull up to the house and immediately find yourself staring into its dark recesses. And I guess I lied just a little earlier -- the shed does still need a fresh coat of barn red paint, so it's not quite "project complete" just yet. That should only be a quick hour or so of work, so hopefully it's a project we can check off the list fairly soon.

Friday, July 7, 2017

Saving the Porch

Ok, it's been a long time since I posted last. The good news is that the delay means we've been working hard at actually doing things and haven't had time to write about them.

One of the things that got done is some work to keep that nasty crack in the front porch from spreading.

This is the crack.
And by "spreading," in this case, I mean "opening up even more and thus completely separating the front pillars from the rest of the porch, causing the whole thing to collapse into a pile of rubble and sadness."

To start off, Chris had bolted the porch together. We figured that at the very least, this should help us know if the porch was actively continuing to settle/fall, and at best, might keep any additional shifting from occurring.

Bolts!
Then my dad came up to help out for a day on the farm, and he and Chris got to work on the porch. The plan was to truss it all up, jack up the roof to take the weight off, and then use come-alongs to draw the two pieces of porch together.

Like so.

This did pull things together slightly, but it ultimately put too much pressure on the pillar at the corner, and we realized that if we pulled any more, we might just pull the pillar down. That would have been counterproductive, so we abandoned the rig before things went too far.

The good news was that during the assembly of this contraption, we had found that the front line of the porch wasn't actually that far out of plumb -- in other words, it had pulled away horizontally more than it had tipped forward. That allowed us to still feel pretty darn good about it when we moved on to plan B -- fill in the crack.

Mortaring the crack.
 By the end of the day, Chris and Dad had the whole thing filled in. Unsurprisingly, this made the porch look significantly less run down.


The braces are off now, and I have to say, this is probably one of the best things we've done so far. It also helps that the rock pile up front has dwindled significantly as Chris -- with the help of various parents -- has been steadily breaking up and carting away the former porch railings. Simply not having the porch look like it has a huge crack that's about to topple the whole thing down into the yard is a major leap in curb appeal -- and now we have a porch we really can feel good about sitting out on to eat lunch or take a break!

Sunday, April 23, 2017

What's Under That? Siding Edition

I'll be the first to admit that the exterior of the house looks... weathered. Or, as our niece said, like a haunted house.

It's a bit gray. Gray is the new black, right?
We knew the siding would have to go. For one, it's gone unpainted for so long that I'm pretty sure it wouldn't really accept a coat of paint. For two, we already had a pretty good idea of what was under it... wasps. Lots and lots of wasps, building their nests in between the top layer of siding and the layer underneath it.

So, on the first nice day of spring, the Great Waspicide of 2017 began. The good part was that they were very, very sleepy wasps. Basically, I'd pull off a piece of siding -- with my hands, because it's really at the falls-apart-if-you-tug-on-it stage -- and then use the pry bar -- and, ok, often just my gloved fingers -- to squish all the wasps. They just sat there and took it.

The lean-to has been the easiest part. Under the hard board siding is a layer of real wood siding, which has now been entirely uncovered and de-wasped, and which after some scraping and cleaning, should be ready to get painted something less pink.

Calling it "cotton candy" instead of "Pepto Bismal" doesn't really improve things.
The main house is harder. Mostly, that's because a whole lot more of it is way above our heads, which so far has meant one person on a ladder removing siding, and the other person on the ground, holding the ladder. This makes for pretty slow going, as it involves a lot of going up and down and moving the ladder around. It's also slow because apparently the one weather feature we can count on up there is wind, which doesn't really inspire one to get up on a ladder to tug at siding.

At this point, we've pretty well decided that there's some bucket lift rental in our near future. But even with just two of us and a ladder, we've achieved almost one side of the house. Ok, it's the smallest side, but still.

This is far less pink than expected.
This new layer of siding is made of asphalt, so it's basically like roof shingles, but as siding. We've been patching up holes as we go, but we're still not sure what we'll do as a final step. We'll probably at least see if this can be primed and painted. From what I've seen, I'm not super hopefully, but I've been wrong before. In the meantime, there's still siding to remove and wasps to murder.

Saturday, April 22, 2017

And The Walls Came Tumbling Down

Remember that amazing stone porch? While the main portion is pulled away from the house a little big, the railings up the steps were leaning... well, kind of a lot.

It doesn't take an engineer to know that this is not right.
We had hoped that maybe we'd be able to winch them together to straighten them out. It did not go as planned.

This is also not right.
After 100 years or so, the mortar just wasn't having any of that, and as soon as the railing started moving, the one on the right also started crumbling. Fortunately, we already had a backup plan in place, which was to remove the railings entirely, use those stones to create pillars at the bottom of the stairs, and then adding metal or wooden railings in between.

That's a great plan, but it still means we have to break up and haul away all that stone. Turns out, that's way more time consuming than scraping off some plaster. The good news (I think) is that by the next weekend, this had happened all on its own.

Goodbye, railings. You were nice while you lasted.
So now we still have to sledge up the stones and move them, but we don't also have to knock over the railings (admittedly, that was going to be the easy part of the job). Honestly, I think I like the look of the porch better this way -- it's a bit cleaner looking, I think.

We're still not quite sure what we're going to do about the rest of the porch situation, but we have a lot to keep us occupied while we figure it out... like moving rocks. So. Many. Rocks

.

Friday, April 21, 2017

What's Under That? Dining Room Walls Edition

Just because I haven't been posting, it doesn't mean that no work has been getting done. In fact, it's finally warming up a bit here in Michigan, so we can open up the windows and finally get the farmhouse cleaned up!

One project that's been ongoing for quite awhile has been the back wall of the dining room. When we bought the house, that wall had some faux brick right behind the wood burner, with wood paneling on either side. The wood paneling could have been worse, but still.

The paneling in question is over on the left, popping up behind the wood burner.
It was, apparently, so nondescript that we didn't even get a good "before" picture. Alas. But then one day, Chris asked The Question... "should we see what's under that?"

Good question. The answer? Kind of a hot mess, actually.


Here's what you're seeing. The brown dots are leftover adhesive that was doing a no-longer-especially-good job of holding on the paneling. The yellow is a skim coat of plaster that had been put on over two layers of wallpaper (the main layer is the kind of blue-gray color) because apparently plastering over wallpaper is a thing?

Also, while we're talking about the dining room, let's take a moment to remember the weird partial wall between the dining room and the kitchen. That bit in the middle by the step-stool is a closet, and above it is the chimney that's getting removed eventually.

Even more paneling. How lovely.
There were two main jobs here: popping the paneling off the divider walls, and scraping the plaster off the wallpaper (and, as a related job, removing whatever wallpaper got left behind). One of these was significantly easier than the other.

Almost one big room!
If you guessed the paneling was the easy one, you're absolutely right. The plaster scraping was tedious. One the right side of the wood burner, at least some of it came down fairly easily; on the left, that stuff did not want to go.


In the end, we finally got it scraped away, and these warmer days have made it possible to goo up the walls with some wallpaper remover to strip off the final remaining layers of paper and paste, so we're finally just left with the plaster.

Ta-da!
You can see what we think might be the shadow of an old picture rail there at the top, and hopefully when we get things all squared away with the walls, there will be one again. Due to the paneling, the baseboard is missing on this wall, so that will need to be replaced, too. But for now, we have at least one clean slate to work with!

And, because I really did like it, one final salute to the original wallpaper from that wall.


Friday, February 10, 2017

Let There be Lights!

Here's the thing about an old house -- it's possible for stuff to be original without actually being original.

A prime example of that in this house is the light fixtures. We think the house was built around 1885, but in the 1880s, only a few very rich people in fancy places like New York City had electrical lights in their homes; it was a brand new technology, and those lights were generator-powered. A farmhouse in the Midwest -- in an area that's still considered pretty rural 130 years later -- would certainly not have had electricity until much later. What that means is that the house also wouldn't have had fixtures for electric lights when it was originally built.

Eventually, though, electricity did make its way to Michigan farms. Some quick Internet searching suggests that the style of most of the light fixtures in our farmhouse is one that was common in the 1920s and 30s. Since nearly all the fixtures fit into that period, we're guessing that sometime around then is when the house was wired for electric lights. So, although the fixtures were added 40 - 50 years after the house was built (i.e. not original) we think they probably are the first light fixtures that were installed (i.e. original).

Master bedroom light fixture

Parlor light fixture

Fixture in the three upstairs bedrooms
 We're not hoping to restore this farmhouse to like-original condition for obvious reasons, like electric lights, and modern plumbing, and not having to cook on a woodstove. What we're hoping for is something closer to creating a home that feels like it's been lived in since it was built, with pieces from different time periods blending together (and if it can't blend, it gets left out -- I'm looking at you, 1970s). This is a long way of saying that we're not going to try to find, say, gas light fixtures from the 1880s that could be reworked to take electric bulbs -- if the house's fixtures seem centered on a particular period, that's what we'll work with.

And the good news is that we had almost all the fixtures. The kitchen fixture is more modern, but pretty unobtrusive, so we'll probably leave it unless we find something truly amazing to take its place.
Kitchen light
However, in the dining room, the light had been totally removed; at some point, a drop ceiling had been added, with fluorescent lights and a ceiling fan. The light is off-center, and the ceiling fan is wired to an extension cord that plugs into the wall. Classy. So those definitely have to go.

We're also short a fixture upstairs. There are three matching fixtures upstairs -- currently, one is in the hallway, one is in one of the bedrooms, and the other is on the floor in the back bedroom. The third bedroom, though, had nothing, so we decided to move the matching fixtures into the three bedrooms and get a different fixture for the hallway.

We thought this might take awhile, but in the course of one weekend, we actually found fixtures for both places. They aren't installed yet (ceilings need work and painting, so there's no point in getting ahead of ourselves), but they're waiting. They're also getting cleaned up, which is why they're currently pictured on lovely backdrops of newsprint...
New fixture for the upstairs hallway


Dining rooms need chandeliers.
And this one is perfect!